pencil me in | NL 6107

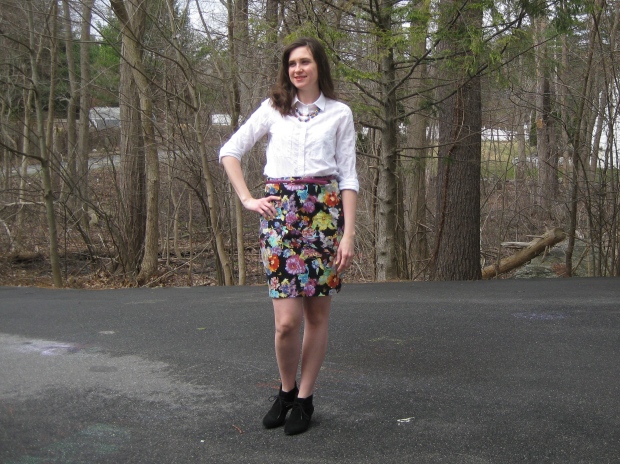
Hey guys! I thought spring would never make it to my neck of the woods. After the epic and record-breaking winter of snow and cold, it looks like we’re finally thawed and back in business! How better to celebrate than by wearing a loud floral print?

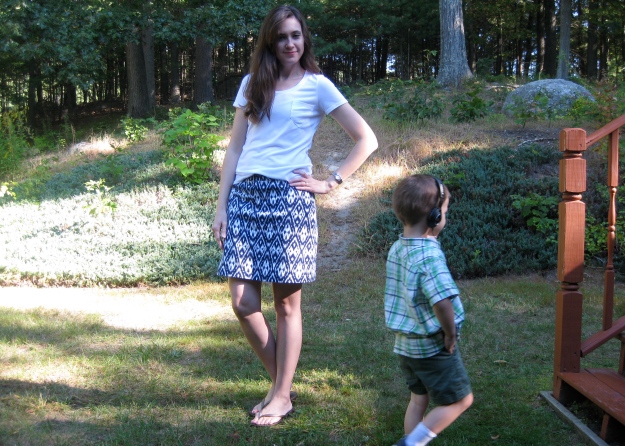
So, I really thought pencil skirts were just never going to work for me, and for the longest time, I didn’t care all that much. Even though I love the look of a pencil skirt, it’s just not something I have all that much use for. However, I’ve had pencil skirts and sheath dresses on my mind lately, and I had this fantastic floral cotton sateen so… I decided to give it a shot.

IMG_4824

my photos are all a bit squinty-eyed… not gonna complain about the sunshine though!

I went through my patterns and found New Look 6107. I slapped together a muslin and while it wasn’t awful, I knew there was something wrong—I just couldn’t put my finger on what it was, or how to go about fixing it. I was going to scrap the idea, but I threw “pencil skirt fitting” into google and out spat a pencil skirt fitting post from the ever-lovely Gail, of Today’s Agenda. How could I have forgotten that amazing post?!

IMG_4812

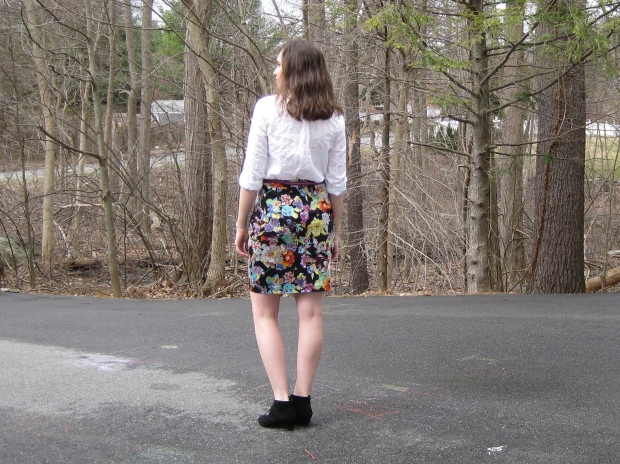
Reading that was a huge “ah-ha!” moment, so I went back to my pattern and made a few adjustments. For the longest time, I thought that it was my backside giving me fit issues. Turns out that was only a tiny part of the equation. What was really throwing off the fit was my tummy and prominent thigh, leading me to the Full Tummy Adjustment, and the Prominent Thigh Adjustment. Gail describes these perfectly, so if you’re interested in the nitty gritty, just check out her post.

IMG_4786

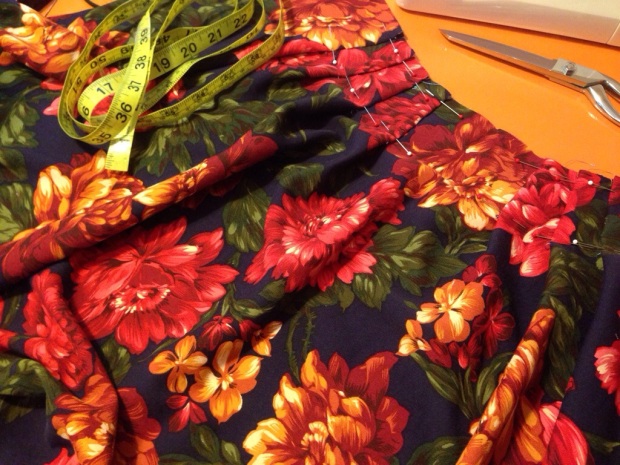
I adjusted my pattern and went ahead and cut my fabric. I basted everything together first to check the fit. Initially I overdid the prominent thigh adjustment, so I took everything apart and backed down on how much I added. While the fit isn’t yet perfect, I at least know what to do about it now!

IMG_4791

This sateen is a cotton/lycra blend, so it has a decent amount of stretch. Unfortunately, it bags out fairly quickly, so if I do any amount of sitting it gets saggy looking. Also, the waistband came out a bit too big, so I really should go back in and adjust that. During construction, I sewed each waistband piece to the corresponding skirt piece and sewed the side seams all in one (skirt, waistband, facing) so altering it won’t be difficult.

IMG_4804

FYI, there was nothing special about this particular pattern; darted pencil skirt patterns are a dime a dozen. Aside from the aforementioned alterations, I added 1/4″ of width into the back dart, lengthened the skirt by 1″, and pegged it about 3/4″ at each side seam. I did choose my size based on finished measurements, because the pattern stated that there was 3 1/2″ of ease at the hip—hilarious! This thing would have been falling off me, had I gone by the size chart. In the future, I think I would add a little more to the back dart, possibly splitting it into two darts, and lengthen the skirt even further. There were two lengths offered in the pattern, and I went with the shorter. Adding an inch in length is pretty standard for me. I think perhaps another two inches in length would be nice.

So that’s about all I have on that. I’m super happy that I don’t have to avoid slim skirted patterns any more, now that I’ve got a handle on the necessary adjustments. Yay sewing!

lisa g.

cropped zippy top and linen skirt

hey ya’ll! i had every intention of blogging my backlog of projects before we went on our summer vacation, but alas. it wasn’t meant to be. probably because i was sewing like a madwoman up until the last day, as one does… MUST SEW ALL THE THINGS. i have several makes older than this combo, but i really like this particular outfit so i thought i’d start there.

IMG_3591

a few months back, i suddenly decided that i needed a navy linen skirt. and then couldn’t find any navy linen at my usual fabric haunts. then one day i ran into joanns for a zip/thread/pattern sale, and their linen was 50% off and they had the exact shade of navy i was looking for. this particular linen is blended with rayon, which gives it a nice soft hand. it also has a subtle woven pattern to it, which is a nice touch. having recently acquired the lonsdale dress pattern, i decided to use the skirt pieces and shorten them by 4″ or so.

IMG_3627

i top stitched every seam to add a little detail, and bar tacked at the top and bottom of the pocket openings. i wish the skirt had a little more flare, but overall i really like it and it fits in nicely with my wardrobe. i’m really itching to pair it with a nettie (preferably in a mint green…) definitely on my to do list!

IMG_3615

after making this skirt i made see kate sew’s zippy top. i really intended to alter my scout tee to have a kimono cap sleeve, but when Kate put up a sale on all her patterns a while back i decided to try it out.

initially i cut this top to full length. when i realized that it would be a perfect match to my navy skirt i tried them on together and just loved the look. i wasn’t super excited about tucking the shirt in, as this fabric—though lightweight and gauze-y—has some body to it that made tucking a little fussy and unflattering. then i flipped up the hem to a cropped length and had a definite “ah-ha” moment. suddenly the crop top trend made sense! it helped that Sonja at gingermakes had just that day posted a crop top/skirt combo of her own, which nudged me in that direction. the crop does considerably narrow my options of what i can pair with this top, but i’m okay with that. i was nervous of over-cropping, so i went with a length in the front that is 1″ lower than the crop line in the pattern, and 2″ lower in the back. i think this worked out great, and i love the subtle sweep of the back hem.

IMG_3652

i actually didn’t plan on putting in the back zip, but as it happened i had a red zip on hand that kinda looked cool with the blue floral, so in it went. my fabric is a smidge see-through, so instead of the facing i did a bias facing at the neckline, and used a scrap to cut out the zip opening in the back.

IMG_3655

i’m really pleased with this outfit. it’s great for summer, and the whole not tucking in my shirt thing is pretty awesome, especially on the extra hot sticky days. our summer vacation was spent in Texas visiting my husband’s side of the family where it is most definitely hot and sticky (though we lucked out on weather for most of the trip!). since we were spending a couple days in Austin, i reached out to Susan of moonthirty to see if she would be available for a little fabric shopping one afternoon. she rounded up her IRL friends, sewing buddies, and bloggers Dixie of dixie diy and Susan a.k.a “Miss Lulu” to join us. i had a great time visiting the local indie shops and getting to know these gals a little better. i think it’s awesome that they all hang out as part of a sewing group, and it has me itching to find some local sewists here at home! anyways, the point is that i wore this outfit for that little excursion, so you may have spied it on IG. haha how’s that for a smooth transition…

IMG_3631

thoughts on the zippy top:

it’s a nice simple pattern to have around, and i plan on hacking it to make a simple pull over dress at some point. the actual pdf file gave me a bit of a head scratching when the file didn’t have any margin lines. i thought that was just a random printer error on my end so i asked about it on IG. kate did offer to send me a new copy, but i had already gone with my gut and worked it out on my own. being a pattern with so few pieces (and easily verifiable finished measures) i’m not terribly bothered. also, i didn’t see a test square anywhere. i can’t always assume that 100% scale actually prints the right size. our current (new) printer has been pretty accurate, but with the older printer we had a few months ago, i usually had to print at 106% to get the right scale. so, i guess what i’m saying is, i like the insurance that i am, indeed, printing the right scale.

pdf issues aside, i found the drafting to be great. often on tops like this the front and back pieces are the same aside for the neckline. that’s not the case here, so i was pleased to see that. i found that it fit as expected, and next time i’ll do a SBA to remove some excess from the front, and maybe a FSA if i can be bothered. even though this is a very simple top, i’m okay letting someone else do the drafting work. it comes together super fast and would be easy to change up for color blocking, neckline changes, etc. i also find kimono sleeves ideal for layering with a cardigan—it’s far less fussy than trying to stuff a regular sleeve into a sweater.

IMG_3621

so that’s kind of a long post for two really simple garments, but i guess that’s just how i roll. 😉

—lisa g.


a better gathered skirt

i like gathered skirts as much as anyone, but i tend to find the gathered rectangle variety a bit annoying. unless you are using a super thin fabric, they can get very bulky, very quickly. so, if you ever want a nice full gathered skirt with less waistline bulk, here’s how…

your typical full gathered skirt will have a hemline about twice that of your waist measurement. here i’m using a measurement of 30″

i’m drafting one quarter of the skirt, since most likely you will be cutting it on the fold.

step 1: divide your waist measurement by 4. this will be your quarter waist measurement

30/4=7.5

step 2: take your quarter waist measurement and multiply by 2

7.5×2=15

step 3: take your quarter waist measurement and multiply by 1.5

7.5×1.5=11.25

step 4: subtract the 1.5 measurement from the 2 times measurement

15-11.25=3.75

on your drafting or tracing paper, start by drawing a rectangle as wide as your 2 times measurement (15″) by however long you prefer. don’t bother with SA’s or hem allowances at this point.

with a straightedge, make about five evenly spaced vertical lines. cut along these lines, leaving a tiny bit connected at the bottom for a hinge.

overlap the slashed pieces until you have reduced the top measurement by the amount you figured in step 4 (3.75″–since i made 5 slashes, i will overlap about 0.75″ at each section). this doesn’t have to be absolutely precise, just keep it all as evenly distributed as possible, then tape the sections in place. since this piece is now a bit of a mess, trace the shape onto another piece of paper, rounding off the edges.

once you have retraced, add your side SA, waist SA, hem allowance, and fold markings at CF/CB. if your back piece needs a seam for a closure, just remember to add SA when cutting your fabric, or trace off another pattern piece with a CB SA.

once you have this drafted, you can add it to your favorite waistband and make a skirt or use it for the skirt portion of any dress.

photo 1

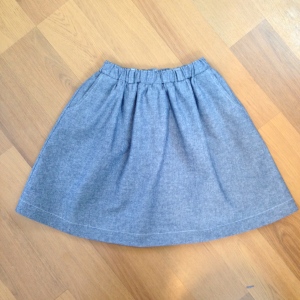
here i made a skirt for my daughter out of chambray. i added yoke front pockets, an elastic waist and belt loops. and sometimes i make my daughter clothes that i really wish i had made for myself…

–lisa g.

colette patterns | zinnia

thanks for all the responses on my last post, it was interesting to hear the wide and varied opinions! after making this skirt, my own opinion is rather torn, but i’ll get to that in a bit.

first of all, i’m very pleased with how this skirt came out. it is just as i imagined and will be great for fall-wearing. the fabric is rayon and perfectly opaque enough to not require a lining. it’s ever so slightly heavier than some other rayons i’ve worked with and has a twill weave on the right side. that twill weave caused a nightmare for hemming! oy. didn’t think i would ever get that hem evened out! i let it hang for two days and it stretched anywhere from 1/2″ up to almost 2″. usually the growth will happen at least symmetrically, but… no. this one was cray cray. add to that the fact that the stitched pleats made it so i couldn’t fan the skirt out and just measure. i ended up putting it on my dress form, measuring from the waist and just hacking away until it looked even. it’s not perfect, but i’m not in the mood to keep futzing with it!

IMG_1707 so what are my final thoughts on this pattern? first the good:

i think the pleated version is nicely drafted. many people are concerned about full skirts and having excess fabric at the waist. to overcome this, the skirt pieces have an a-line shape, and pleats that fan out. this skirt has a 90″+ hem, so really it’s the best of both worlds: full skirt, sleek tummy.

i love the belt loops for being able to add a skinny belt, but they also blend in if i choose to go sans belt.

the waistband is a perfect width—not too skinny, not too fat. i chose not to interface the waistband, but instead underline it with muslin. i can’t seem to get good results fusing onto rayon, it always ends up puckering after a wash or two. underlining gives the waistband plenty of structure while not being stiff.

the sizing seems accurate. and since you only have one measurement, it really should be. that said, i finally got smart and went up a size from what i measured for. i have a fairly high waist, and prefer that my skirts sit an inch or two lower. so, i measured where i wanted the skirt to sit and cut my size accordingly. revolutionary, i know, but with as little ease as this is designed for, i didn’t want to fight with it every time i wore it. plus, being a fall skirt, i may have bulkier shirts to tuck in. plus, plus… i can cinch it in with a belt. i should have raised the pockets though, because now they sit pretty low. oops.

IMG_1712

alright, now the less-than-good:

the directions and construction methods on colette patterns continue to confound me. they call for so much hand stitching, basting and frankly, techniques that don’t provide professional clean results. on the pleats, you are supposed to baste them, press them, edgestitch them, then remove the basting. why? because my rayon was kinda funky to work with, i basted them by hand on the front piece (i was afraid that bringing the skirt to and from the machine so much might cause the waist to stretch out). there are 16 pleats altogether, so this is not for the faint of heart! on the back pieces i basted by machine, and everything was fine. however, removing the basting was quite a chore. and i can’t see a good reason for removing the basting, so i’ll definitely skip that next time. or just not stitch down the pleats at all. i think in a nice drapey fabric, stitching the pleats wouldn’t be super necessary if you are disinclined.

and then the waistband directions were a bit strange. you are instructed to sew the edges of the waistband before sewing the waistband to the skirt. however, it is so much easier to sew the waistband to the skirt first, then finish the ends. i opted to skip basting the inner waistband before topstitching, and just pinned and went for it, as is my custom.

IMG_1727

also, if you plan to make the belt loops, do yourself a favor and don’t use the pattern piece. it is way too small. i cut mine 1/4″ wider, and a couple inches longer. you sew the belt loop piece lengthwise, turn the tube right side out, then cut into six belt loops. i always find that the ends get a bit beat up in the tube turning process, and then you only have 1/8″ to turn under on each end of the belt loop when you sew it on. that, my friends, is just not enough. after struggling with the original piece for about 5 seconds, i recut a piece so i would have 1/4″ to turn under on each side and that was perfect. you’d think such a simple thing as belt loops they’d get right… weird.

lastly, i bought the .pdf version and there is something wrong in the printing. when scaled at 100% my test square was larger by more than 1/8″. i adjusted the scale until i got the test square right, but then the margins were off. the pattern indicates that the margin is  6″ x 10″ and when the test square was the right size, the margins were not. so… i guess i’m not sure which is faulty: the test square or the margins. i noticed that a few other people had issues with the skirt pieces being too small, so i wonder if the .pdf is faulty. my pieces matched up fine, so… this is kind of a question mark.

IMG_1733

i realize this is a lot to say over a skirt, so yippie if you made it to the end of the post! overall, i like the skirt and the pattern a lot. not thrilled about the construction techniques, but i tend to go my own way so this doesn’t make much difference to me, though it may to you, which is why i’m putting it out there. this is billed as a beginner pattern, and the gathered skirt i imagine would be beginner friendly. the pleated version… maybe not so much. with sixteen pleats to manage, a lot could go wrong.

okay, i’m done!

links: zinnia by colette patterns | chambray archer by grainline

—lisa g.

zinnia skirt

i just started working on colette pattern’s new zinnia skirt. i made sure to snag the .pdf when it was on sale and didn’t really plan to make it up quite yet, but the sewing gods have spoken and into my grubby mitts landed a sweet granny floral print rayon. it has those perfect fall colors and i keep saying i need more skirts. it’s a good thing i had mentally noted the fabric requirements, because this skirt takes a lot of fabric! i wouldn’t have thought the skirt needed more than a yard and a half but, this skirt is cut on the crossgrain (directional prints need not apply) and the hem is a whopping 84″-97″ depending on what size you cut. i had 2.5 yds of 45″ rayon and that was just enough. typically i find colette’s yardage totally out of whack, but this one is spot on. of course, if you want to do any print matching—buy extra! for mine, there was no worry and i didn’t bother with matching on the CB seam. hopefully it won’t matter.

20130927-090945.jpg

since this pattern includes instructions for a lined/sheer overlay version i was curious to see the directions for this, and i’m afraid i was a bit dissappointed. in fact, there’s a tiny detail in the directions that just doesn’t jive. you construct the main pieces of the skirt (pleats stitched through both sheer and lining layer) then you insert the invisible zip through both layers and sew up the back seam, again through both layers. later you are instructed to hem the shell, then trim the lining by 1″ then hem the lining. but… how? if they are both attached down the CB seam? this is not at all how i would approach this.* jen over at grainline has a nifty tutorial where you finish the overlay opening and simply insert the zip into the lining only. the overlay hangs free, then the seams are sewn and finished separately.

now, after i bought the pattern, i happened across the discussion thread on pattern review (whose site is down at the moment… will link up later) and this pattern has garnished some criticism for being too simple, and just another dirndl skirt. now, i’m not sure why people were so up in arms, but i just want to clarify for anyone interested—this is not a dirndl skirt. and, if you do the pleated version, all the fullness should be under control around the squishy belly parts that we don’t need to add tonnage of fabric to. with the pleating action, you wind up with a partial circle skirt. same with the gathered version (as in, it has an a-line shape so there is significantly more fullness at the hem than there is at the waist. while the gathered one is nice, and gets top billing on the cover, i think the pleated skirt is really the star of the show and the reason i bothered to buy the pattern.

now you can probably find cheaper alternatives, and people kept pointing to tilly’s gathered picnic skirt, which is a rectangle, i.e. same fullness at the waist as there is at the hem, but i do like the ability to be able to print off another copy of the pattern if i really need to make up a different size. that, and i trust the indie pattern sizing so much more than big 4. if i look at the waist measurement on colette, i can feel pretty safe that the size it corresponds to won’t end up having 4″ of ease. if i grab a simplicity pattern, i have to hunt down the pattern pieces and measure the different sizes to see which will give me a reasonable amount of ease. obnoxious.

i didn’t start this post in order to pontificate on pattern drafting and who does it better, but each pattern company relies on a specific block that will work for only a small number of people. colette has one block, while sewaholic has another block, and burda, simplicity, vogue, etc has their own block. there is little wrong with the individual blocks—they will fit someone!—but if they don’t correspond to your body type, changes will have to be made. no. big. deal. what i don’t appreciate is the unreasonable amount of ease given by the big 4 (making the size chart irrelevant), which indie pattern companies have handled much differently, and i believe, much better.

anyways, drafting pleats, while not hard, is tedious and time consumming. i’m trusting that colette patterns did all the engineering for me, and i know there are a lot of people out there who have no interest in drafting such a pattern. so, yeah, you pay for the convenience. in fact, i spent last week working on a very basic dress (with pleats!) and it took all week to get the details right. i could have sewn up the dress in little more than a day, but since i was fiddling with pleats and sleeves etc, it was a bit of a chore!

okay, i’m not entirely sure where i’m going with this post, my mind has been a scatter of trying to work sewing time in with the fact that i only have one kid at home most of the week. one who has never had to play by himself until now. and, even though we limit the activities our kids are involved in i still spend a few days doing little but running kids from here to there…

so what do you guys think about the zinnia skirt? love it? hate it? indifferent? do tell!

lisa g.

*after writting this up… i see colette patterns addressed this pattern error and future printings will have the correct directions. i still don’t think it’s the best way to go about a sheer overlay, so do with that what you will!

another moss…

my love affair with grainline patterns is pretty well documented as of late, and evidently i needed another moss skirt! i went to sewfisticated (one of my local fabric haunts) last week in search of some lightweight denim (which i found) and stumbled across this marc jacobs stretch denim. for $4/yd, i couldn’t pass it up. i didn’t buy much, and planned to save it for shorts next spring, but i decided i didn’t want to wait. so, another moss skirt was in order. hopefully i can pair it with some tights and wear it through the fall as well; three-season wear (spring, summer, fall) is way better than summer only!

IMG_1655

with my previous moss skirts i’ve added things like back pockets, belt loops, and extra topstitching. I decided to keep it more basic this time around, and not bother with all those extra details. plus i really wasn’t in the mood for print-matching back pockets. the only pattern change i made was to the front pockets—i kept them rounded out like my denim moss. for some reason, that shape is just my favorite.

IMG_1679

i did my best to keep the fabric print matched through out the seaming, and i think i did a damn fine job. can you even see the zip fly without zooming way in? or my CF or CB seams? yeah. like a BOSS. the only thing i’m annoyed with myself for is forgetting to yank the twill on-grain before cutting the front. if you squint, you’ll see that the print kinda skews up a tad. not a huge deal, and really it’s pretty minimal, but whatevs. i didn’t have enough fabric to recut, so… not gonna be bothered by it!

IMG_1659

i love this skirt so much. the pattern, the fabric, it just makes a dull day a little brighter. i’ve been crushing on patterned skirts/shorts/pants for a long time, so finally i got a little piece of that trendy pie.

IMG_1651

photo-bombed by my hipster son… how could i not include this pic?

—lisa g.

possibly the most boring skirt i’ve ever made

how’s that for a blog post title to really suck you in? riveting, i know. just to let you know how boring it is, i made this skirt monday, threw it in the wash (i always wash my twill makes before wearing them), and totally forgot about it! i came across it when sorting laundry this morning and was all—hey, new skirt… sweet!

IMG_1208

super bright outside, but whatevs. i can never pull myself together to take morning pics with better light.

okay, so i wear my denim moss mini all. the. time. it’s in pretty heavy rotation, so i knew i was due for another “basics” moss (from grainline studios, incase you’ve been living in a cave). i had intended to make one from the same fabric as my daughter’s shorts, but finally conceded to the fact that the color is too close to the actual color of my legs and would probably end up way too wash-y out-y. however, i had plenty of fabric left over from my husband’s jedediah shorts, and that fabric color is a way more flattering, but still a go-with-everything, basic color. and now we match d’awwwww…..

IMG_1181

i gave the skirt a more slash pocket treatment instead of the slant and gape. i can’t say i really prefer one pocket type over the other, i just like to be difficult.

IMG_1184

and, as before, i added back pockets and belt loops. then, because last time i had a hard time with the zipper insert as drafted, i added an extra 1/4″ SA on the underlap side of the fly.

IMG_1179

the waistband is cut as one piece which means that the front of the waistband ends up being on the bias. i noticed that my denim moss distorts a little because of this, so to help prevent the waistband from mis-shaping too badly, i pieced my interfacing so that the bias part of the waistband is reinforced with on-grain fusible. i used a woven fusible (stuff i had picked up for collars and cuffs) and really like how it holds up in waistbands (though not so much for the collars and cuffs…). i really don’t know what the best way is to interface waistbands, i suppose i should look into that, given my affinity for sewing them.

IMG_1214

anywho… since this skirt is rather plain i decided to jazz up the insides with some leftover seersucker for the waistband facing and leftover floral cotton lawn for the pockets, which just happens to be the same fabric the top i’m wearing. so… my top matches my pockets haha! gotta love that.

IMG_1183

to top it all off, i decided to hammer in a snap for the front closure. basically lazy me didn’t want to make a buttonhole and sew on a button. plus, hammering stuff is way more fun.

the end.

—lisa g.

moss mini, in denim

as soon as i made my first grainline studio moss mini i knew i would be making another. it so happened that when i made my denim thurlows earlier this year i used my ninja layout and cutting skillzzzzzz and had quite a bit of denim left over. just enough for a skirt! oh yes, i’m that good. so i wanted to go full on denim skirt here and go crazy with the topstitching and pockets and belt loops. the whole deal.

IMG_0486

first thing i had to do was modify the front pocket situation. both the thurlow pattern and the moss mini have the “pocket gape” feature where the pocket stands out just a bit from the body. due to the position of the pocket opening (a slant as opposed to a more vertical slash opening) the gape makes it so the pocket is useable. in order to get a classic jeans pocket shape i had to eliminate the gape, then draft a rounded opening. i even added a coin pocket.

IMG_0412

one feature of this pattern is that the pocket bags extend into the fly construction. it gives them great stability and helps everything lay nicely. however, it does create some bulk around the fly facing and attaching the zip to the underlap, so i may modify this if i make the skirt again (which i most likely will). also, the fly construction method was completely different than any other method i’ve seen. you sew up the entire overlap side and topstitch it before sewing any of the underlap. admittedly, i have mixed feelings on this… due to the pocket pieces also being sewn into this seam, and my heavy-ish denim, i lost a bit of SA to turn of cloth and i barely had enough room to sew the zip to the underlap side. i think it would be good to have a little extra SA on the underlap to make sure there is plenty of room. that said, i’m very intrigued by this method as it is completely new to me!

photo 1

i hammered in a heavy duty snap instead of using a button

i am totally pleased with the fit i achieved. based on my last make, i decided to go up a size in width on the back pieces, then shave about 1/2″ off the CB yoke at the waist tapering back out over le bootay. i also cut the waistband with 1/2″ less at CB to compensate. this worked out perfectly and, for a girl who has had to deal with gaping waistbands all her life, it is so thrilling to have complete coverage. no gape. i can sit on the floor with the kiddos and it still holds snugly over my rump. oh and i lengthened the skirt in place of doing the hem band.

IMG_0490

i went all out with top stitching. i am by no means a perfect top stitcher, so i cheated a little and used my blind hem foot adjusted to use as a guide for edge stitching, then a 1/4″ quilt piecing foot for the second row. seriously easier than driving yourself crazy doing it by eye. also, i would have loved to flat-fell my seams, but i figured i could only ask so much of my machine. the bulk would have just been too much, and i’m pretty content with serged and faux-felled SA’s.

photo 2

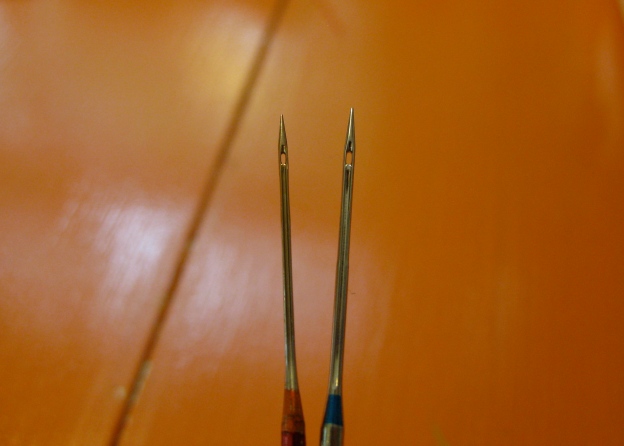
last thing: i use a fairly entry level babylock sewing machine, but no matter what machine you use, you can’t expect it to breeze through bulky denim seams without using a proper denim needle. i can’t stress this enough. i’ve used regular needles for heavier weight fabrics and end up with broken needles and top stitching that is all wonky. not only is a denim needle stronger, the eye is wider to accommodate thicker thread (hello top stitching!). also helpful: a hammer nearby to whack those bulky seams into submission before top stitching. makes a huge difference. plus, it’s just fun.

IMG_0402

regular needle on the left, denim needle on the right

well i’ve been sewing up a storm and will hopefully get back soon with a couple more things i’ve finished. then… well i need to sew up some kid stuff. i might even *gasp* refashion some of my older RTW that is out of rotation. wish me luck…

—lisa g.

p.s. my top is blogged HERE. 🙂

costume meets spring outfit

my daughter anastasia is performing in a school play this week and needed a costume. the play is called “Rats!” which is a musical about the pied piper of hamlin. the organizers gave very vague guidelines about what kind of outfit she needed…

“blouse and skirt. preferably knee-length.”

that’s a direct quote. uh, time period? country? color palate? anything??? so i quiz my daughter and her best offering was “before technology.” okay, so i went with a pretty generic outfit here and something that can get plenty of use outside of the play.

IMG_9909

i went to joanns for my fabrics and basically i’m never buying fabric there again. the more i shop other fabric stores (which i can’t get to as often because they’re just far enough away that it’s an inconvenience) the more i realize how over-priced joanns is. no wonder they always have stuff on sale and offer 40-50% off coupons continuously! so annoying. anywho… for the skirt i went with a linen-cotten blend fabric that i gathered onto a waistband (elasticized in the back) and lined with some leftover bemberg i had around. i added patch pockets to give it some detail. since the fabric was striped i cut the pockets curved and wide at the top so i could gather them onto a strip of binding. i love how the stripes fan out creating some visual interest without being all look this fabric has stripes so i made them go every direction possible! not that i’m opposed to such, but i wanted to keep it subtle.

IMG_9905

finding simple white fabric for the top was challenging though. i didn’t like any of the shirting fabrics, so i ended up with something out of the quilting section. it was reasonably priced and closest to the weight and feel i was looking for. i’m generally against quilting anything in the garments i make because the fabric doesn’t hold up to repeated washings that well, but i didn’t want to spent too much time or money looking for the right fabric! life goes on.

IMG_9908

the pattern i half-drafted myself. i only have one kids woven top pattern (mccalls 6388) that i made for her last fall. i like the neckline and thought it would look nice with a peter pan collar, so i took the yoke pieces to get the top started and drafted the rest. i extended the center front line so i could make a fold over placket for buttons. i drafted the collar and finished the inside with bias tape. i’ve never actually made a peter pan collar so i was worried it wouldn’t lay flat, but it seems to be doing just fine.

IMG_9907

i really like how the blouse turned out. it’s such a sweet useful top, and i was able to stitch most of it up in one afternoon. hopefully i get around to making this again because the girl could use a few more nice tops!

side note: i’ve recently become addicted to instagram, so if anyone is interested you can find me under lisagaskamp. while i like to snap pics of my sewing stuff (and would love a sewing-enthusiest audience!), my kiddos happen to be super adorable and show up regularly. don’t say i didn’t warn ya.

side, side note: i’ve tried to put the instagram button on my sidebar but it keeps showing all the code along with the button… while i’m not super tech savy i’ve never had that problem before… any ideas?

—lisa g.

moss mini AND dolman tee

so i made a green corduroy skirt eons ago and never really liked it all that much. (i hesitate to link to it, but here you go) i think i wore it once, altered it a bit, then chucked it into the closet never to be seen again. until recently… i unearthed it from the bottom of a pile of sweaters and thought maybe i should do something with it. there was a decent amount of fabric and the moss mini from grainline studio came to mind. i bought the pattern and lo and behold, it just fit! the original skirt had buttons down the front so i decided to keep them and not mess with a zipper.


i didn’t bother to muslin this, i figured if it didn’t fit i can call this my muslin and still be okay with that. happily it does fit well enough to be worn. yay! i measured a size 8 so that’s what i cut. it still seems a little snug in the hips, but it is a mini skirt, so i think it’s okay. the waist was a little gaping in the back so i took in the back yoke by a small amount to curve around le boo-tay.


as you all know, this skirt lives up to it’s name as a mini skirt. i cut the skirt to the longest length then made a faced hem with bias tape i reclaimed from the original skirt. also—polka dot pocket lining! 


the only other fitting tweak i need to work out is that space below the waist but above my hips. i’m not sure if i have proportionally low hips or what, but that area above the pocket is just kind of floating out there. i’ve had this problem before, so i guess i need to pay more attention to it. since i was using an existing button down skirt i couldn’t sew the pocket lining into the fly as the pattern instructs and i think that would have helped to pull that part in closer to the body. no worries, there will be a next time with this pattern.


i had to piece the waistband because it was a hair too short… we’ll just call it a design featureoh, and i added back pockets and belt loops because i thought it needed them.


fortunately the small fit issues i have don’t render the skirt useless. i had some purple cotton lycra knit so i decided to make cation designs dolman tee. i’ve seen these pop up over the past months and while i liked it, i wasn’t sure if it was the right style for my figure. i always feel like my shoulders stick out funny and the lack of shoulder seam can exaggerate it. however, i am happy to say i think this top is not only supremely comfortable, but also flattering! 


when i printed the pattern the scale was off (i got 3.5″ for the 4″ square) so i took an existing knit tee pattern and picked my size based off that. it all worked out and i think this is my new favorite tee! it was wicked fast to sew and would have been even faster to cut, however i had less than a yard of fabric so i had to do some fancy maneuvering. i cut the hem band in two pieces and had to cut the sleeve bands with the grain. i had plenty of stretch going both directions so it worked out fine. also i did a neck binding instead of band. i like the wide neck slouchy look for this.

so look at that, a whole outfit in one weekend! both projects were super fast and i love how they go together. can’t wait to try more grainline patterns, i just bought fabric for an archer blouse. so excited for that one!!!

—lisa g.