this post is all about de-mystifiying a zippered fly front. if you examine a RTW fly, it’s not inherently obvious how it is constructed. while there are numerous fly tutorials out there (this is the one most frequently referenced) i feel they are lacking in one way or another. hopefully this post will be enlightening!
a few thoughts first…
this tutorial will be most helpful for anyone sewing the sewaholic thurlow, because it already has all the extra pieces included. i will show in another post how to draft these pieces if they aren’t included in your pattern.
unfortunately, the fabric i am using here is extremely difficult to photograph. many of the pictures are clear, but a good handful are slightly fuzzy. also, my top stitching thread is dark and doesn’t show up that great. when i do another project with a fly (and i have at least two more in my que) i’ll update the pictures.
lastly, my fly facing is narrower than it should be, i won’t bother you with why. again, when i do another fly i’ll update this post.
first, get a feel for what you are going to do. grab a pair of pants and look at the zipper. basically, the fly is nothing more than a lapped zipper. one side of the zipper tape is sewn to the underlap, and the other is sewn to the overlap. the overlap is topstitched through the facing securing it to the front. the fly shield is back there as a layer of protection from the zipper. that’s not so complicated, right?
now that we’ve made peace with the fly, let’s get to work. for this tutorial, i will be referring to left and right sides as the “overlap” and “underlap” sides. most patterns are drafted so that you zip with the left hand, even though all the RTW i own zips from the right. i suppose it doesn’t really matter, but i can assure you it would bug me tremendously to have the fly zip from the left! moving on…

the over and underlap sides are different only in that the underlap has an extra 1/4″ or so along the edge. this will be where the zipper attaches, and the reason it’s there is to ensure that the zipper is fully lapped by the overlap and not exposed in any way.

note that most patterns will have two markings for the fly. the upper one is where the zipper stop goes, and the other is about 1/2″ lower and marks where the CF stitching ends. i find that too many markings tend to become confusing or get lost, so i only mark where the zipper stop goes, either with chalk or a little snip in the SA. this marking goes on the underlap, the fly facing and the fly shield. they’re all the same distance from the top. also, at the waist, mark where CF is on the underlap side.
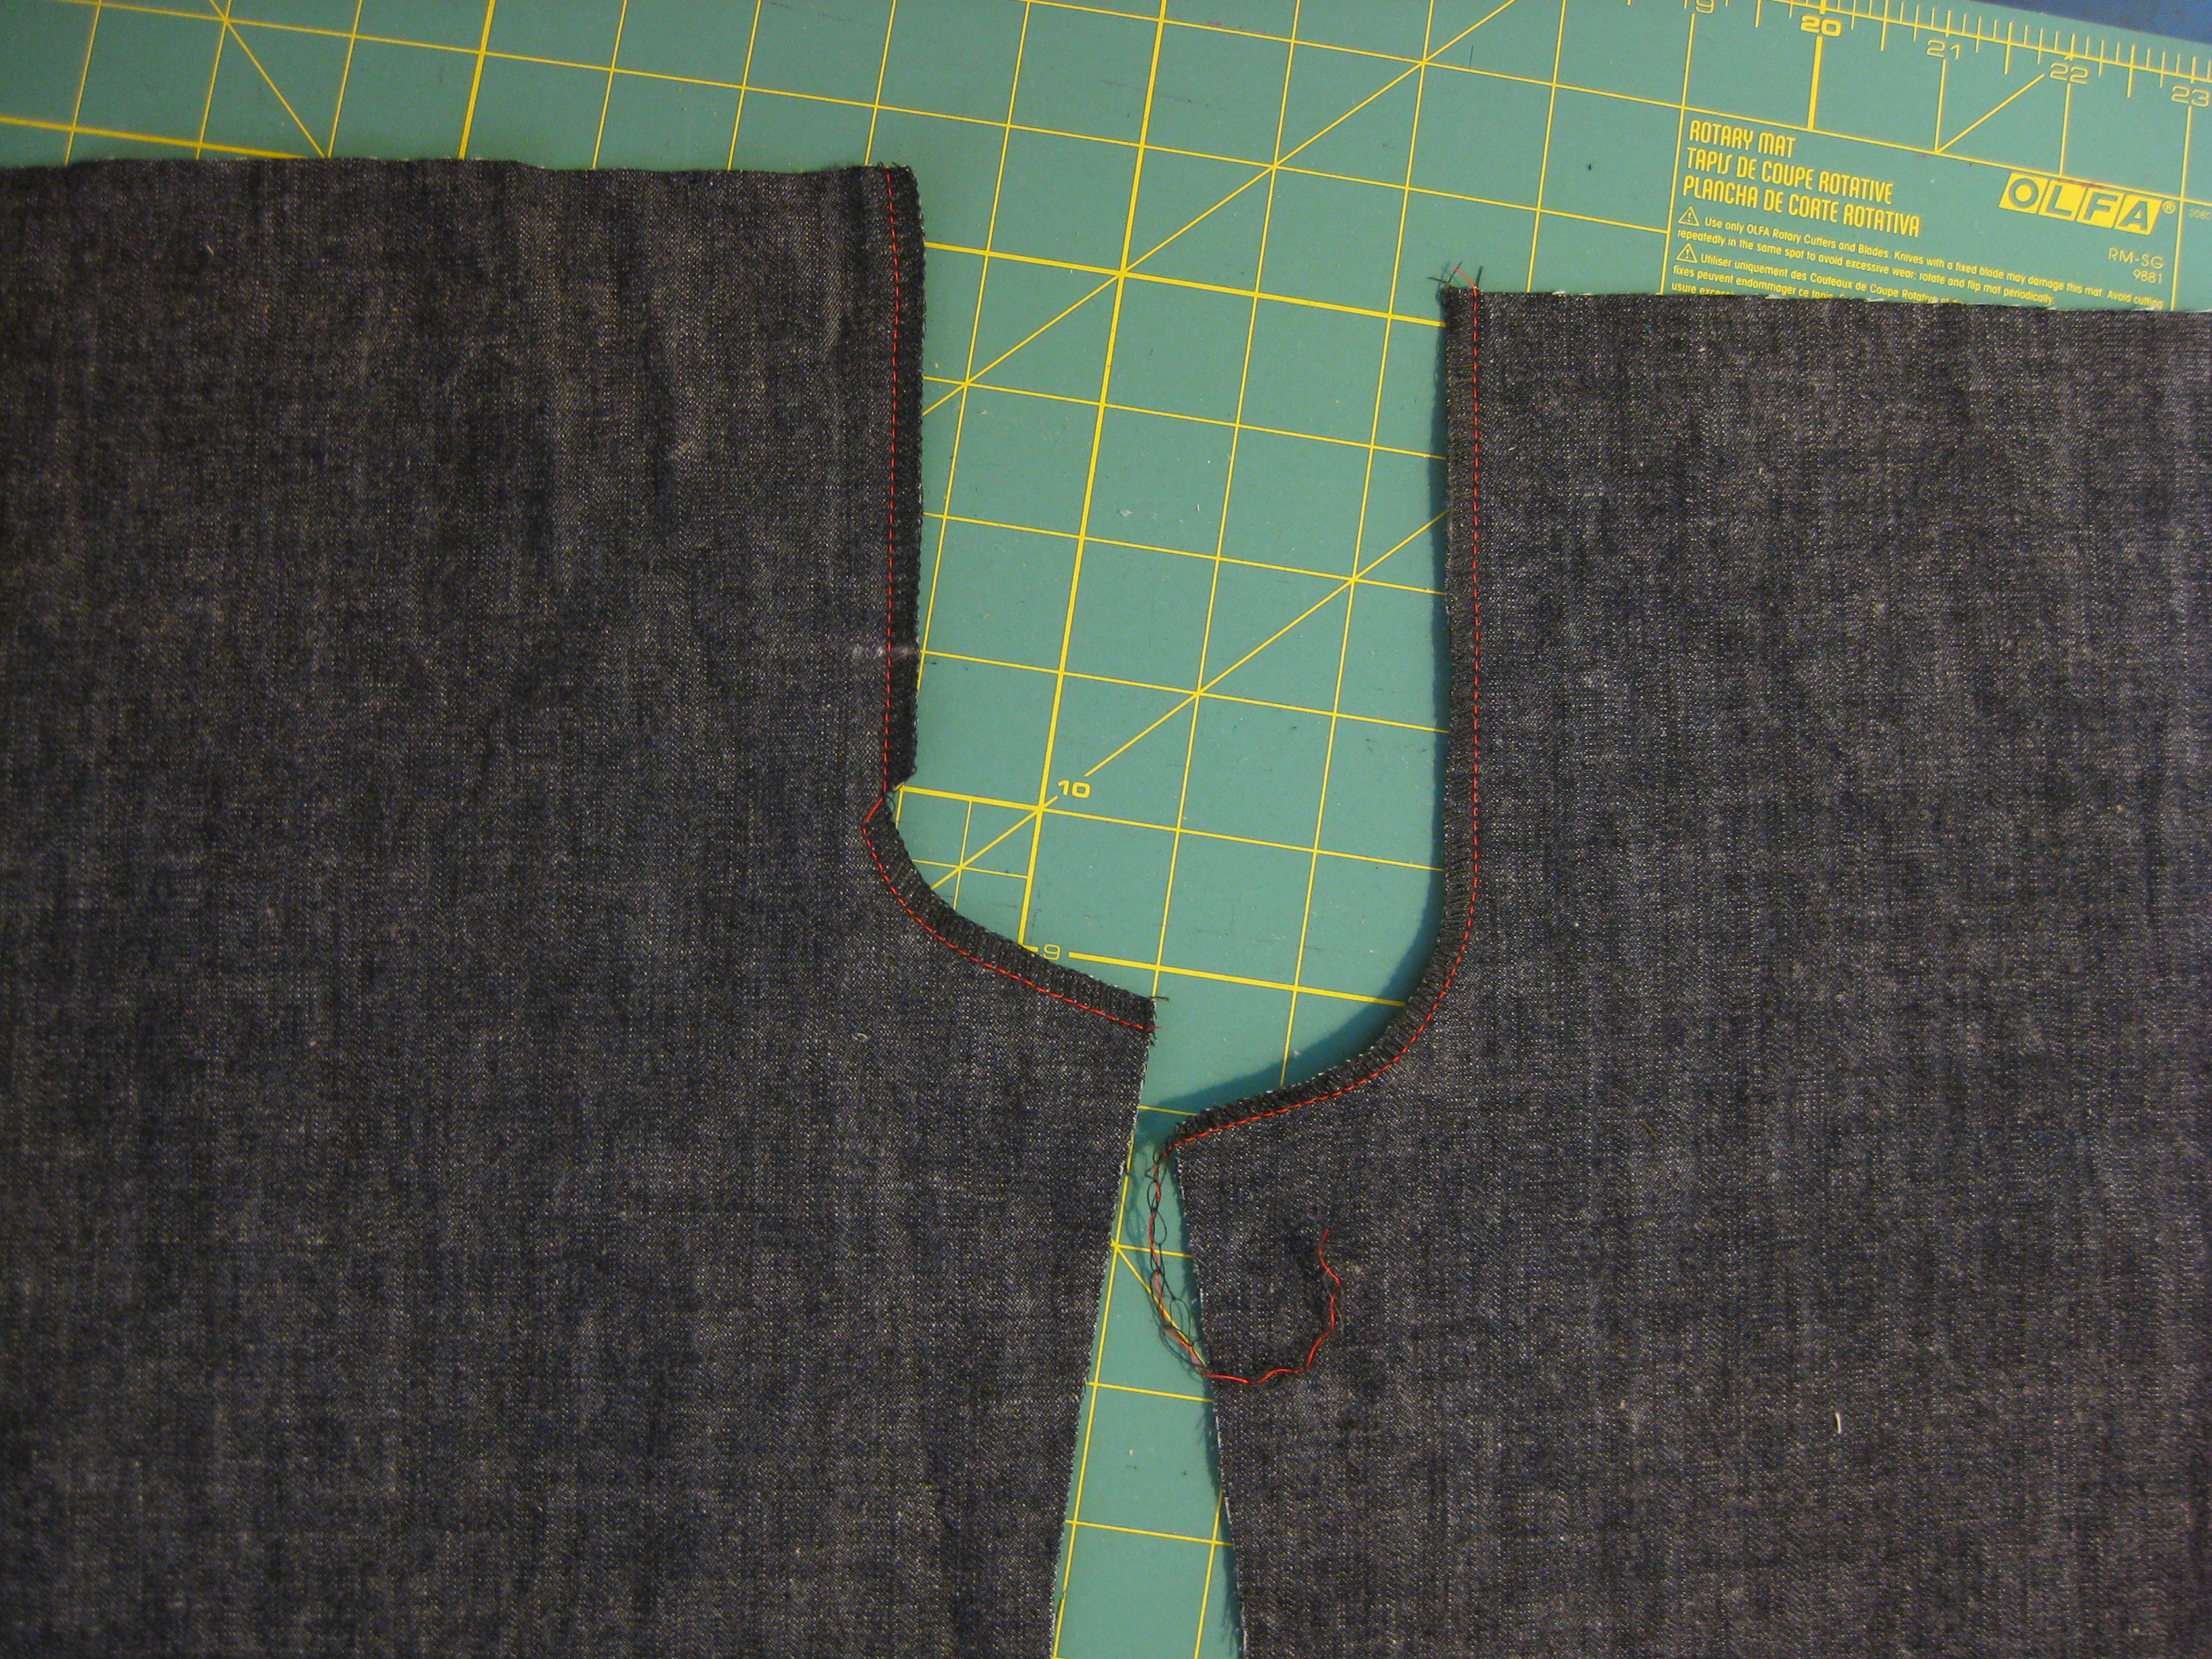
finish the edges however you prefer, zig zag or serge. i highly recommend doing this now because as construction proceeds, it will be difficult to get back in there to finish those edges. also, i recommend reducing the front crotch curve SA to 3/8″. i left it at 5/8″ for this tutorial, but 3/8″ is definitely better.


grab your fly facing and sew it to the overlap, stopping at the mark. grade, press and under stitch, then turn in and press again.

now take the other front side and sew them together at the front crotch curve, stopping 1/2″ below the mark (where my pin is pointing). you will need to make sure you keep the facing out of the way.

clip the underlap SA so the crotch curve SA can lay to the overlap side, and press.


if you are making a dress pant, you can leave it as is. if you are making a more casual pant, clip the crotch curve then top stitch from the waist all the way down along the edge of the overlap. a more casual pant typically sits closer to the wearer, so top stitching the SA flat along the curve will make it more comfortable.

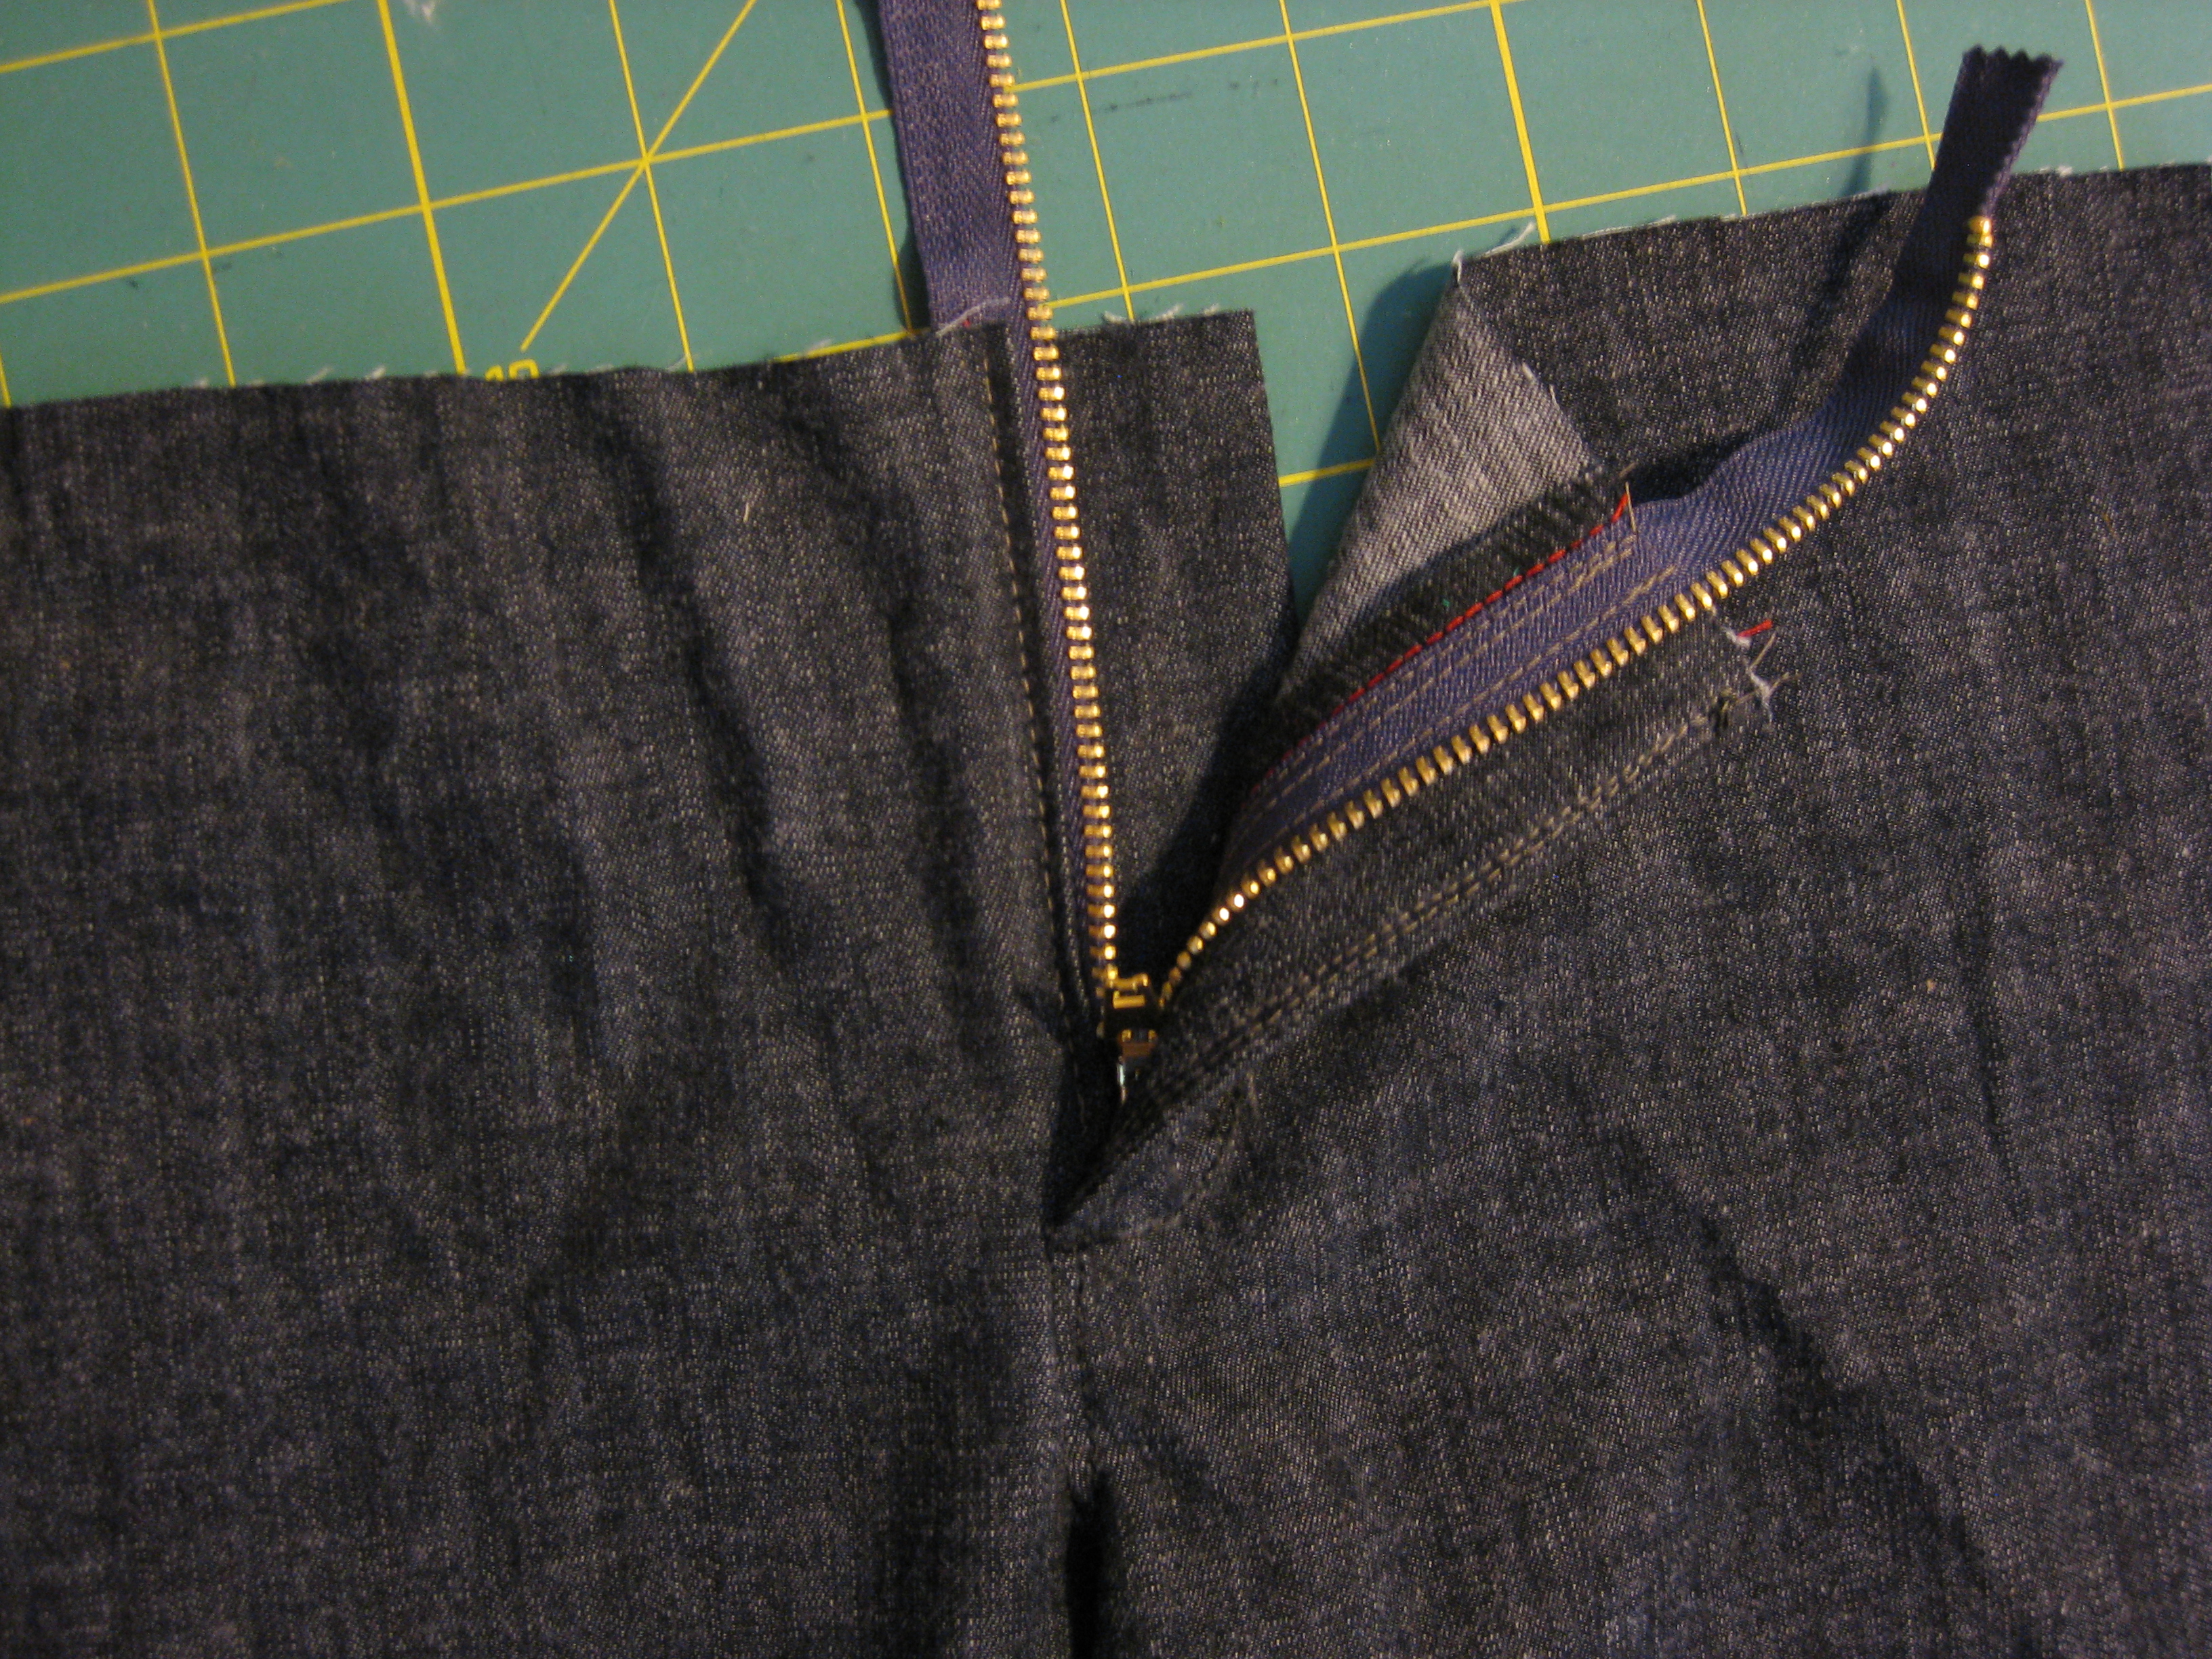
fold the overlap side down and out of the way and line the zipper face down on the front edge of the underlap. the zipper stop should be lined up with the marking.

with the zipper foot, sew close to the zipper teeth all the way down the tape.
now take the fly shield (which should be folded in half and one edge finished with a zig zag or serger) and baste it on top of the zipper, sandwiching the zip between the front and the shield. sorry, didn’t get a pic! grr….

now turn it all to the inside and topstitch along the edge of the zipper, stopping at the zipper stop.
at this point, you should be able to tell if everything is positioned correctly, your zipper is going the right direction, etc.

pin the fly shield back and out of the way.

turn your work over, and from the front, line up the edge of the fly facing with the center marking on the underlap side.

hold that in place with one hand, then flip up the front and pin through the fly facing and the edge of the zipper tape.

staying free of the front, sew two rows of stitching on the zipper tape to secure it to the facing.

looking at the front, mark 1″ or 1 1/4″ away from the CF curving down 1/2″ below the zipper stop—this should be in line with where you began sewing the front crotch curve. once you are happy with your markings, pin through the pant front and the fly facing, and topstitch (the fly shield is still pinned out of the way). once you get to the curved part of your topstitching, put your needle down, raise your presser foot, reach under and flip up the bottom edge of the fly shield so you don’t catch it in the top stitching, then continue topstitching to CF.

unpin the fly shield and, through all layers, bar tack where your topstitching meets CF (which is the bottom of the fly opening), as well as somewhere along the upper part of the curve. if you are sewing a dress pant, make the second bar tack only on the inside, tacking the fly shield to the fly facing. again, referring to any RTW pants you have will help you determine the position.

you will have to pull out the zipper teeth that are in the SA and move the zipper stops down (here’s a diy link). then all you have left to do is pat yourself on the back and admire what a great lookin’ fly you have!
—lisa g.

Awesome!! Thanks so much for posting this. All of the details and multiple pics are so helpful. The fly on my Thurlows is not pretty so this should really help on my next pair!
great! i understand why print directions are so sparse, it takes a LOT of pics to illustrate the whole process!
You are awesome, thanks for this! There are a few little details here that will help me a lot, especially moving the zipper stops down- whutttt??!! I feel like an idiot that I never thought to do that, I just hack it off and call it done, ha. I’m sure that will be much nicer 🙂
thanks, glad it might help! since a lot of my pant making is for the kiddos, i don’t want to risk having a zipper pull go flying off at an inopportune time… 🙂
Wow, what a terrific and detailed tutorial! I am saving this for when I get into the zip-fly sewing… 🙂
Excellent! Have it pinned for when I finally get around to making some pants with a fly!
Wow, what a great tutorial Lisa – it’s so clear and your pictures are super helpful! Do you mind if I refer people to it on my blog (http://threadtheoryblog.wordpress.com/) for extra help when the Jedediah pants are released?
you are more than welcome to– i would be flattered!
Very clear, even with the fuzzy pics/dark fabric! My big question, though, is how do you deal with the too-long metal zipper?
i use a pair of jewelry wire cutters to pry off the metal teeth and to open the zipper stops at the top. it can get a little messy so i fray check the zip tape. then, with pliers, clamp the zipper stops back in place out of the way of the stitching line. it’s kind of obnoxious to do, but using a sturdy metal zip is totally worth it! at the bottom of the post there’s a link that illustrates the process, i just do it after the zip is inserted instead of before.
Every time I’ve sewn a fly, I’ve somehow managed to sew the blasted thing together. Every. single. time. It’s posts like this with a bazillion pictures that makes blunders like that harder to do. Thanks Lisa – I’ll be keeping this in mind for next time.
I’ve sewn quiet a few fly zips and I never tire of reading fly zip tutorials like you. You’ve reinforced this technique with me really well.
I prefer to zip on the right side too.
This is great, Lisa! Thanks for pointing me to your tutorial. I’ll have to try this method on my next fly to really get the hang of it. Just from reading the post, however, the main difference between this method and the Moss instructions seems to be that you sew the zipper to the underlap first, instead of the overlap first. This is a huge improvement, because I found it difficult to get the presser foot to the bottom of the underlap once the overlap was already sewn down, if that makes any sense!