MN Mini Cottesloe

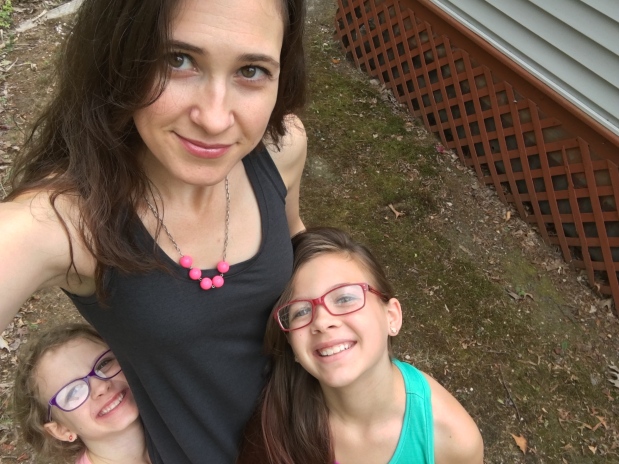
Hey guys! Long time, no blog, huh? I’m popping back on here to show off the newly released Megan Nielsen Mini Cottesloe swim pattern. I’ve tested her Mini line in the past and just couldn’t say no when this one came along to test!

My youngest daughter, Izzie, is eleven, but she is a tiny eleven year old, well within the MN Mini size chart. I let her select which version she wanted and she went with the two piece high rise bottoms. Her height put her at a size 10 or 11, but her largest width measurement put her in an 8. Because this was a two piece, I cut a straight 8. If I were doing the full one-piece suit, I would have done some lengthening.

The whole suit came together very easily and she absolutely loves it! If I had to do again, I might leave off the bottom band of the top and just finish it with elastic, as it is quite long. Also I couldn’t get my machines to top stitch the bands in place, it was all too thick, but the band stays in place just fine without the top stitching.

She really loves the high-waisted bottoms. They’re a nice modern option and provide good coverage. All the RTW suits she’s ever had were too loose, or safety-pinned at the waist, or too short in the torso for her size. I’ve long wanted to sew a suit for her so she could have something that actually fit well and was more comfortable—it’s no fun feeling like you’re about to lose your suit the whole time you’re in the water! Testing this pattern was great motivation to finally make good on that promise.

Finding fabrics locally was a challenge. I found these at two different stores and they happened to go together well enough that I could use them as coordinates. The pink is definitely a swim fabric (nylon/spandex) and the printed fabric was labeled as yoga or athletic fabric, but since it was nylon/spandex I figured it would work just fine, and it does. It is thicker than the pink so it was a little challenging once I also had the thickness of the lining and elastics in there too. Both fabrics have 50% stretch, which is the minimum stretch recommendation.

We took it to the beach a few times and it easily withstood a day of boogie-boarding and those ocean waves. This suit gets a big thumbs up from us! I’m guessing she’ll never go back to a RTW suit after wearing one that fits so well.

lisa g

True Bias | Lodo Dress with sleeves

You know how it’s annoying when a blogger disappears and never gives a proper sign off or at least a Hey I’m a bit busy for this space I probably won’t be posting anymore… ? *Cough, cough* Anyway… Just popping in to say that yeah, new posts probably won’t be happening around these parts. I have and will continue to be on IG (well, until the algorithms drive me away… ugh) but I’ve kinda moved on from my own blogging, especially when I have to choose between sewing, and writing about sewing. Sewing always wins. I started working as a substitute teacher last year so between that and the regular after school runaround and keeping up with four kids, I just don’t have the time/interest to keep up with this space. I don’t plan on deleting the blog (though tbh, the blog name feels a little cringe-worthy to me now) so no worries if you have something bookmarked. I still get a lot of hits on certain posts, so those will all remain. And who knows, I may pop back in from time to time when I have something I just must share. Like today!

Recently I was struck with the idea of making the True Bias Lodo Dress with sleeves thinking it would be super comfy to wear this fall and basically I had to have it like now. You know how it goes. I really liked this pattern when it came out, but  didn’t think it would work for my pear shape. My measurements put me at like a 4 at the bust, and a 10/12 at the hip. So… yeah.  I ended up blending from a 6 at the bust to a 10 at the hip. Then I added a little extra on the side seams on the back only at the hip, because that’s where I need the extra width. I think this worked out really well to accommodate my shape while retaining the cocoon shape of the pattern.

I also did a square shoulder adjustment. Because I’m more petite from shoulder to waist, I dropped the shoulder seam at CF/CB, rather than raise the seam line at the shoulder. I marked where my shoulder hits, cut out the neckline, cut along the shoulder seam line, then dropped the neckline down by 1/4″ and pivoted the shoulder seam down to match (note that the shoulder seam actually gets shortened slightly because the angle is less steep). On the front, I made my cut partway down the V-neck, then blended the line. Effectively this raised the V by 1/4″.  Lastly, I lengthened the hem by 1″.

For the added sleeves, I started out by tracing the sleeve from the Grainline Hemlock Tee. I wanted a deeper armhole, so I widened the sleeve cap and also curved it a little so I didn’t end up with too much extra fabric under the arm. Just to be really confusing, the Hemlock Tee has a 1/4″ SA, which I ignored since I am using thicker fabric than that tee is designed for, and added a 3/8″ SA all around. After basting everything together and trying it on, I decided to narrow the sleeve back down to the original width below the elbow. My sleeves here are shorter than the Hemlock sleeves because I ran out of fabric. When I bought my fabric there was just shy of 1.5 yds available so I couldn’t fit the full sleeve length on my yardage!

I would love to make another one of these, and if I do I would probably extend the shoulder line by about 1″ and curve the seam line under the arm to make it easier to sew up the side seams. Otherwise, I’m really happy with how this came out! My fabric is a cotton/lycra ponte, so it has good body and nice stretch. I was worried about it bagging out during the day, but that didn’t happen. In the store, the fabric looked decidedly olive-colored, but in regular light it’s olive with heavy brown undertones. Kinda bummed about that, but it won’t stop me from wearing it.

Thanks to everyone who has stopped by and read my posts over the years… it’s been fun 🙂

lisa g.

Denim Shirtdress | New Look 6487

I don’t browse the New Look selection very often, partially because I don’t like the website (though it is improved from the original re-design) and partially because they never go on sale like the Simplicity/McCalls $1-ish sales at JoAnn’s. In all fairness, the standard $5 price tag is super reasonable, so I should really peruse their selection more frequently. As a bonus—I never need to wait for a sale.

img_3183

The “tween” pattern New Look 6487 stopped me dead in my tracks, so I made sure to pick it up. It’s so cute! I love all the style options included. I’m sure it’ll be on repeat all year round—currently all three of my girls are asking for one version or another. Being the youngest girl, Isabella always gets the ratty hand-me-downs (poor thing!) so I try to make her something special every now and again. She happened to be with me when I bought the pattern and she loved this lightweight denim at JoAnn’s—perfect match. And seriously, this fabric is so nice and soft! I’m sure I’ll be going back for more.

img_3198

The smallest size is an 8, and she is very tiny as is (just shy of 9 yrs old), so I knew it would be big on her. I did not make any size alterations to the pattern because I figured it would be fine to be oversized now, and hopefully fit her better next year. I did eliminate the back pleat because I felt it was odd to have the pleat combined with the gathered skirt. Idk, maybe I’m just being weird, but I didn’t like it. Since there is plenty of volume as is, I simply shifted the back piece off the edge of the fabric, and did the same with the back skirt piece.

img_3196

The only other change I made was to cut different chest pockets. The pattern has a funky pocket shape and I wasn’t digging it. I keep pocket templates sitting around in my sewing room, so I just grabbed a kid sized pocket and used that.

img_3184

I just want to note how pleased I was with this pattern! The yoke, collar, and collar stand all have full size pieces, with the grain line correctly indicated. Frequently these pieces are cut on the fold and laid perpendicular to the grain, where they should be turned and cut with the grain. At least this is how it’s done in RTW, and also how David Coffin illustrates it to be done in his Shirtmaking book. Additionally, the neckline and collar pieces have 3/8″ SA’s, making it infinitely easier to assemble. I always cut down the SA’s if they are any wider than this, so it was nice that I didn’t have to fuss with changing it myself.

img_3187

Oversized or not, she is completely in love with this dress and has snuck in several wears before throwing it in the wash. It’s denim, so who am I to judge. She plans to layer it with leggings or tights and a long sleeve tee underneath so she can continue to wear it through the winter since you can’t easily stuff the sleeves into a sweater. All in all I am super pleased with how this dress came out, as is Isabella. I’ll definitely be sewing this one again, and *ahem* maybe making a knockoff for myself…

—lisa g.


TL;DR

PATTERN: New Look 6487
FABRIC: lightweight denim | JoAnn’s
SIZE: 8 (measurements for reference: 4’2″/22.5″/21.5″/24″)
MODS: eliminated back pleat, used different chest pocket
ALTERATIONS: none
NEXT TIME: no changes planned

Style Arc | Abby Cardi

We had a serious end of summer heat wave that made me think summer would last forever, but we’ve begun having decidedly chilly mornings (like low 50’s F) so I guess we’re moving on to fall. I stitched up the Abby Cardi from StyleArc because I can never have too many cardigans for layering up. I used a cotton/poly blend interlock from a local store. I usually try to avoid poly blends, but this felt so very soft, and was in the absolute perfect color.

img_3121

The thing I like about this cardigan is that it has a nice drape for the front, but doesn’t overwhelm you with fabric. I also really like how minimal the fabric is in the shawl collar. Sometimes having too much fabric weighing on the back of my neck gives me headaches, and I don’t think I’ll have to worry about that here.

img_3118

The construction is fairly simple, but mitered corners at the shoulder/neck join are always a pain. The instructions don’t mention it, but definitely stay stitch around the corners before snipping into them. With the instructions as vague as they are, it took me a bit of head scratching to figure out where everything was supposed to align. Once I chucked the directions and started working it out on my own, it all came together super fast. I went for a nice clean finish on the collar/facing, and did a nifty burrito roll to encase the neckline seam.

img_3128

The drape front is left with a raw edge, as is the entire hem. I prefer to avoid raw hems when possible, so I added a hem allowance to the back piece so I could hem that part, while leaving the front as is. I think this worked nicely, and I would definitely do it the same way in the future.

Here’s a few detail shots…

img_3135

fold over facing from the inside, raw edge encased

img_3137

added hem allowance to the back piece, front edge left raw

img_3138

hem from the inside

As far as fit is concerned, I added some width from waist to hem on the side seams to accommodate my hips. The shoulder seam is falling off my shoulder a bit (I think I have somewhat narrow shoulders) and I wouldn’t mind an extra inch in sleeve length (I hemmed them at 1/2″ instead of the drafted 1″ to preserve a tiny bit of length). The sleeves were also a touch wide, so I trimmed them down.

img_3109

Overall I’m very pleased with this pattern. The fact that it isn’t a fabric hog is a huge bonus. It was one of StyleArc’s free patterns of the month, and I’m glad I had it on hand when I had the itch for a new cardigan!

lisa g.


TL;DR

PATTERN: StyleArc Abby Cardi
FABRIC: cotton/poly interlock knit from Fabric Basement (local)
SIZE: 8 (measurements for reference: 5’8″/34″/27.5″/39″)
MODS: Added hem allowance to the back piece
ALTERATIONS: added width at the hip, narrowed sleeve
NEXT TIME: bring in shoulder seam, lengthen sleeve

Chi Town Chinos

When the Chi Town Chinos popped up a recently, I was interested in giving them a try. I’ve been a dedicated lover of the Sewaholic Thurlow, but this pattern has a feature that sold me—a faced waistband!  I hate sewing on waistbands. HATE. It always takes me fooorreeeverrr to do!  Alina Sewing + Design Co. is new to the indie pattern scene, and tbh, I usually shy away from first time pattern releases. But, I’m happy to report that I was genuinely impressed by this pattern. It really looks like she aspires to the same type of RTW details I’m always drawn to. Oh, and there’s also a skirt variation. Love a two-in-one pattern.

IMG_2964

As expected, I don’t fall into one straight size. I’m definitely pear-shaped, but most of my hip circumference is in the back. For this reason I opted to make a FSA (full seat adjustment) instead of trying to grade between sizes. I used a tutorial on the Colette blog, and it felt like a lot of guesswork—from where to draw the lines, to how much space to add… if you have super nice fabric, definitely play around with muslin first. I ended up adding about 1/2″ in width (1″ total) and 3/8″ to the back rise. I also scooped out the back crotch a tad and lowered the front rise by 1/4″. After these adjustments, which are very typical for me, the fit is basically spot-on, so that was a relief! Next time I may reduce the dart from the FSA and instead take some width out of the side seam at the waist. I feel like they’re not quite hugging my waist the way my Thurlows do, but hopefully minimal tweaks will get me there. I hemmed my shorts to have a 3 1/2″ inseam (instead of 4 1/2″) as is my preference.

IMG_2953

The one detail I did change was to make a separate fly facing instead of using the cut-on facing. I feel that a sewn on facing is more sturdy in the long run. Really the only little nit-picky thing I have to say about the pattern is having to search through the directions to track down the SA’s used for various pieces. I’m in favor of varied SA’s, but since some pieces are 1/2″ (back pockets, zipper facing) and some are 5/8″ (general construction), it’s easy to forget. It would be most helpful to have a single diagram to look at, or at least have them indicated on the individual pattern pieces. The instructions themselves are very hand-holdy, fine if you need it, but I would really like to see them a little more streamlined. I found myself having to jump around in the directions for things like belt loops and how to finish the SA of the facing.

PicMonkey Collage

The fabric I used is a Kaufman Kobe twill in grey from fabric.com and it’s really nice stuff! Getting twill the right weight for shorts can be a bit hit or miss (this is 5.7 oz/sq yd), but this one is perfect. It’s lightweight enough that seams don’t get overly bulky, but sturdy enough that it doesn’t feel flimsy at all. Plus it’s available in a wide variety of colors—I want them all!! The only downside is that they do stretch out a little with wear. While that’s pretty normal for cotton twill, I feel I can only get about two wears out of them before I want to chuck them in the wash to shrink them back down. Overall, I am very pleased with these shorts, and I can see myself making many more pairs in the future.

IMG_2961
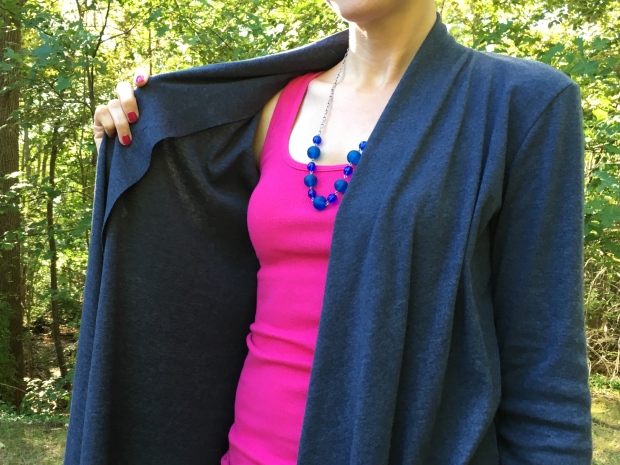
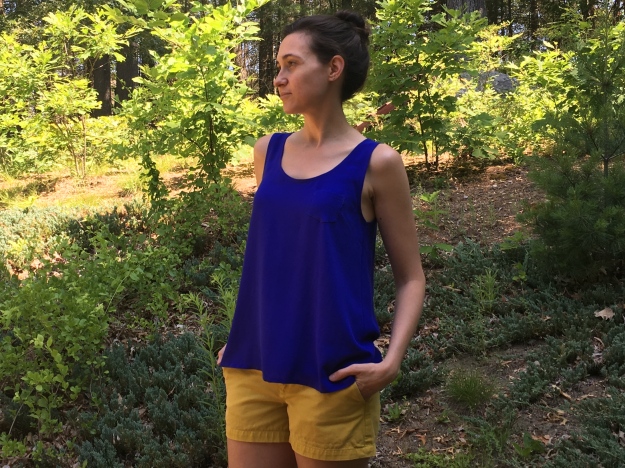
One last thing… the blouse I’m wearing is Simplicity 1106, previously made here. As before, I omitted the back cutout, and this time I added 2″ width at CB, which I gathered onto the yoke for a small amount of visual interest. Because I added width at CB I took 1/2″ off the side seam on the back piece from waist to hip. While I love that it has a neckline facing, I opted for a bias facing, mostly because I’m out of my good interfacing… Love this pattern for a quick top!

lisa g.


TL;DR

PATTERN: Chi Town Chinos by Alina Sewing + Design Co
FABRIC: Kaufman Kobe Twill from fabric.com
SIZE: 8 (measurements for reference: 5’8″/34″/27.5″/39″)
MODS: used separate fly facing, shortened inseam to 3 1/2″
ALTERATIONS: full seat adjustment, lowered front rise
NEXT TIME: bring them in at the waist, distribute some of the dart intake to the side seams

Rumi Tank Dress

Okay, it’s rare that I jump on a new pattern the minute it’s released, let alone print it, trace it, cut it out, sew it, and wear it all within 24 hours. Oh, and then blog it. RARE. But the stars aligned for me yesterday… I had ordered some rayon jersey from Craftsy (weird… all their solid rayon knits are gone now) and it just wasn’t the kind of rayon knit I was expecting. It is quite firm, has minimal stretch, and doesn’t drape in the way I expect a rayon knit to drape. To be honest, I’m not overly impressed with this fabric, and it just wasn’t going to work with my original plan.

IMG_2913

So I literally had this fabric out trying to figure out what to make with it, when I saw the Rumi Tank pop up on IG. It was a perfect match. I paused for a minute, I mean even on sale, it’s still almost $10 for a simple tank. But… I just went through all my paper patterns and got rid of a huge stack of them because the tissue was cut and therefore useless to me or anyone else, and was reminded of why .pdf patterns are so appealing. If I screw it up, I can always print off a new copy.

IMG_2892
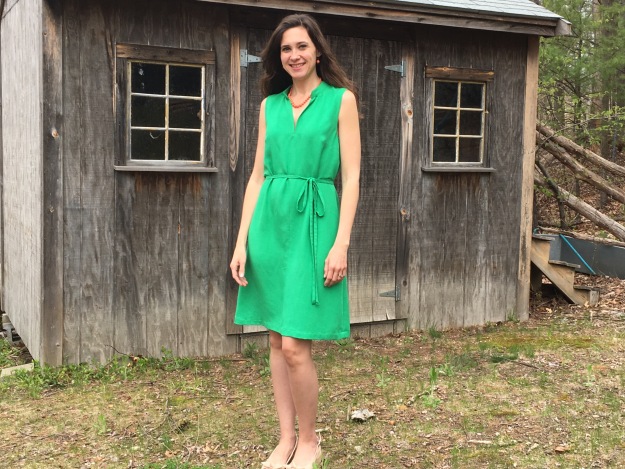
This is the first pattern from Christine Haynes that I’ve purchased, and I was very happy with the .pdf formatting. It printed in a very economical number of pages and everything matched up nicely. I traced off a size 6 at the bust and graded out to an 8 at the waist and hip. Given the flare of the skirt, grading between sizes wasn’t strictly necessary, but I did anyway. I raised the neckline by 1/2″ as a precaution (I am forever needing to raise necklines) but in this case it would have been fine as drafted. I skipped the color blocking at the hemline, and simply extended the length of the dress.

IMG_2924

The sizing feels spot on, and other than a little bit of pooling in the back, I’m perfectly happy with the fit. I’m so in love with the swingy flare of the hem. After all the swing dress posts I’ve been seeing lately, I’ve had them on my mind!

IMG_2896

I love how my dress came out, and I think this will be a very useful pattern. Also included is a regular tank top (less flare than the dress) and I’m sure I’ll be using it in the future as well. Really, this is an ideal summer dress for me since it’s casual enough that I don’t feel overdressed for the day to day mom stuff (side note: my 8 yr old said “Wow, you look fancy!” quickly followed by, “Well I guess it’s no different than pajamas…”), plus it’s breezy for the crazy heat we’ve been having. I’m ready to move on to Fall sewing, but oy! the heat and humidity is not going away! So not used to it out here in the Northeast.

IMG_2883

Here’s to the last days of summer…

IMG_2933

—lisa g.


TL;DR

PATTERN: Rumi Tank by Christine Haynes
FABRIC: rayon jersey from Craftsy (no longer available, and not really recommended)
SIZE: 6 bust, graded to 8 at waist and hip (measurements for reference: 5’8″/34″/27.5″/39″)
MODS: raised neckline by 1/2″ and extended hem to eliminate hem color blocking
ALTERATIONS: none
NEXT TIME: if I’m being fussy… I’ll remove length from CB to minimize pooling

Skater Dress | McCalls 7079

I recently picked up McCalls 7079 to make my oldest daughter (12 yrs) a casual dress. I love that this pattern has several different style options, from plain to a little more girly. This will be a very versatile pattern to have around!

IMG_2504

I let her pick out the combination she wanted, and she opted for short sleeves and a flared skirt. I was going to do the triangle back cutout, but decided to go with the plain back to check the fit first. Without the cutout she can easily pair this with leggings and cardigans for Fall.

The fabric I used is from Cali Fabrics. It’s a cotton/lycra and is perfect for this style. This was the first time I ordered from them, and I was pleased with the quick shipping and overall quality of the fabrics; I’ll definitely order from them in the future since they have such a large selection of knits. My only quibble with this fabric is that the black ink bled in places onto the white. I usually use a color catcher when washing fabrics like this, but I totally spaced. Overall, it’s not really noticeable, but something to note if you have this one in your stash.

IMG_2509

She generally wears a 12/14 in girls sizes, but her measurements put her all over the place for this pattern. I decided to sew a straight size 12 since I didn’t need to be overly fussed about fitting. This seems to have worked out just fine—it fits well through the shoulders, and still has some ease through the waist. Now, she’s not really into letting me closely examine her to check the more fine points of fitting (and this print is really busy, obscuring any fit issues from the casual observer) but I think she could use a little extra length in the bodice front.

IMG_2505

The sleeves have quite a bit of extra ease in the sleeve cap—more so than a knit tee requires—so I lowered the cap by about 3/8″ to remove some of it. Also, the sleeves have a 1″ hem allowance, which seems unusually deep, so I cut off 1/2″ and did my preferred 1/2″ hem.

The only other change I made was to the neckline. The instructions suggest that you double turn the neckline and top stitch in place (a 5/8″ hem allowance). I just really, really hate that type of finish, and looking at the few examples I found online, the neckline looks too wide to me. Changing nothing to the pattern, I simply added a 1/2″ neckband, sewn with a 1/4″ SA. With the neckband it looks more like a regular t-shirt neckline, and that’s really what we wanted anyway.

IMG_2503

Sleeve cap and neckline preferences aside, this is a great pattern, and I’m sure I’ll be using it frequently. My girls love this style of dress, and it’s so fast to sew up. Most importantly, she immediately declared it her “favorite dress ever!” so. That’s a win.

—lisa g.


TL;DR

PATTERN: McCalls 7079
FABRIC: cotton/lycra from califabrics.com (available here)
SIZE: 12 (measurements for reference: 5’0″/32″/24.5″/31.5″)
MODS: added neckband
ALTERATIONS: lowered sleeve cap
NEXT TIME: add length to front bodice

Woven Tank Love | McCalls 7411

Before I get into the pattern, on my last post I made vague references to having a really sucky year… I don’t like to bother about personal issues here (sewing is my refuge from life and stress!), but it was very heartwarming to read all your well-wishes. Without going into all the nitty gritty (gawd… I could write a book on it) my husband had been laid off from his job (single income family… yay *sarcasm*) and it took a bit longer than anticipated to get back on our feet. We’re on the up and up now and he landed a fantastic job. It feels like the stars aligned for us in the best possible way, and this, after feeling like every single thing had gone wrong over the past… well, decade, has just felt amazing. There’s still a mountain to climb before we’re back to good, but we’re feeling optimistic for the first time in a very, very long time.

IMG_2084

But on to the important stuff! I’ve made Grainline Studio’s Tiny Pocket Tank at least six times by now, and despite my best efforts it just never fit right. They’re still perfectly wearable—and I wear them constantly during the summer—but I’ve tired of tinkering with that pattern and decided to start from scratch with a new pattern. I picked up McCalls 7411 and decided to sew up a muslin in some cotton lawn to check the fit. Even though I’ll probably always use a rayon challis or some other drape-y fabric, I find it easier to diagnose fit issues in something more stable.

Side note: I’m going to start adding a TL;DR section at the bottom of my posts if you just want to scroll through pics and get the basic deets in the fewest words possible.

I traced off view A in a size S, then slashed and spread it at the side seam and added about 3/4″ (3″ in total) at the hip. After my muslin, I pinched out a tiny bit at the shoulder seam/neckline to do a square shoulder adjustment, did a SBA, then pinched out some width under the arms, blending to nothing at the waist. For once the bust dart was in the right spot (warning to those who often lower bust darts! I usually hike it up a good 1/2″!). I also eliminated the CB seam and cut it out on the fold.

IMG_2098

I sewed up my adjusted pattern in a rayon challis from JoAnn’s and I love how it came out! The only thing I’ll change next time will be raising the armholes. I checked the armholes on my muslin, but they seemed okay. It’s possible the fabric stretched out a bit during construction, though it’s pretty common for me to raise armholes.

IMG_2073

As a nod to the TPT, I added a tiny pocket to this pattern. I keep a few pocket templates around my sewing room, so I just used one I had on hand. I’m very happy with how this tank came out, and it will be my go-to woven tank pattern from now on. There was always something off about the Grainline version and, since Jen retired that pattern and came out with the Willow as a replacement, I kinda felt like it was time for me to move on as well.

lisa g.


TL;DR

PATTERN: McCalls 7411, view A
FABRIC: rayon challis from JoAnn, discontinued
SIZE: S, with alterations (measurements for reference: 5’8″/34″/27.5″/39″)
MODS: eliminated CB seam
ALTERATIONS: square shoulder, SBA, narrowed underarm, added width to hip
NEXT TIME: reduce armhole depth

Salme Buttonless Shirtdress

Oh hey there! I’ve been pretty low on blogging motivation as of late, but maybe Spring will put me back in the mood for taking pictures and whatnot. Life took a (somewhat) unexpectedly crappy turn this year, but hopefully we’ll be back in the swing of things shortly. Fingers crossed!

FullSizeRender_2

Anyway, I’ve been in the mood for a new spring/summer dress. I really want to make a proper shirtdress, but time and motivation lacking, I decided to try the Salme Buttonless Shirtdress; a  pattern I bought ages ago but never got around to sewing. It’s a pullover shift dress with a loose fit and collar band. It’s a nod to the shirtdress without quite going all the way. I think it was the gathers at the neckline that sent this pattern into MUST HAVE territory for me, because I adore that small detail.

IMG_1666

This is the first time I’ve made a Salme pattern, and tbh, I haven’t seen many people sewing them up. I don’t know why though, the designs are all really classic and they come in at a very reasonable price ($6-8). Based on my measurements, I cut a 6 at the bust, 8 at the waist, and 10 at the hip. If you’re in between sizes it would be pretty safe to size down. This dress has plenty of ease, but not overwhelmingly so.

I feel like maybe the patterns are drafted for someone a bit taller than average. The bust dart and arm holes are a solid 1″ too low. It’s fairly common for me to remove length above the bust, so this isn’t a huge surprise. Also, I typically add length to hemlines, but here I shortened it by 1″ and it still hits just above my knees (I am very long from waist to knee, fyi).

FullSizeRender_3

Since the bust dart was so low, I decided to unpick the side seam and dart and re-sew the dart angled up by 3/4″. This worked alright for a quick and dirty fix—at least the dart is headed in vaguely the right direction now. I wasn’t super fussed about getting a perfect fit, so while I couldn’t do anything about the low armhole at least the bust dart is passable. The only criticism I have of this pattern is that there isn’t a marking for where to start the neckline gathers. I just guessed and tried to make sure it was even on both sides. Oh, and you do have to add seam allowances. That’s not a negative in my opinion, but I know it’s a deal breaker for some.

FullSizeRender

The fabric I used is a linen, rayon, poly blend from Joanns. Isn’t the color divine? I hesitated for a moment because it’s so bright, but I’m glad I went with it. I’m typically not attracted to solid colored fabrics (must buy all the pretty prints!) but when I get dressed in the morning I always wish I had more solids to choose from.

FullSizeRender_4

Bottom line on this one… LOVE. This is such a versatile dress that would be equally suited to a summer BBQ as it would a date night. It isn’t fussy, and it feels very chic. With shirtdresses all the rage these days, I would think this would be a very popular pattern. Anyone else been sewing up Salme Patterns? I’ll definitely be paying more attention to their offerings in the future.

lisa g.

plaid wool coat

A couple years ago my husband’s aunt sent me a box of fabric, which included several cuts of Pendleton wool in various weights. No idea where it all came from originally, but there were receipts mixed in with the fabric dated from 1992. (So does 20+ years make it vintage? Egads!) Most of the fabrics coordinate in a pink and teal color scheme—not so much my style, but it occurred to me that this plaid fabric would look great on my 10 year old daughter, Sylvia.

IMG_1238

Since the fabric is crazy bold, I wanted to pair it with a classic tailored style. I used Burda 8/2013 #143, which I’ve had on my favorites list for ages. It is quite a bit of work prepping a Burda coat pattern, but the lack of included seam allowances allows me to add SA widths of my choosing, which I actually love. I followed the RTW Tailoring Sew-A-Long over on Pattern-Scissors-Cloth (instead of the Burda directions), which makes the whole process go so smoothly. Gawd if she released an eBook with all that great information, I would be first in line to buy it!

IMG_1205

I used Pro-Weft Supreme, Medium fusible from Fashion Sewing Supply for the interior structure. This interfacing was an absolute pleasure to work with. It’s very soft and easy to fuse; perfect for a coat. I also used fusible hair canvas for the collar stand and lapels. I lined the coat with a thin poly satin (leftover from another coat project) and then underlined the main body pieces in flannel for some additional warmth.

IMG_1225

Cutting out plaid coating is no joke people. It took me several hours, even though there were relatively few pieces. Each piece was cut individually in a single layer, and painstakingly matched. Despite being suuuuper careful, I managed to cut the back pieces about 1/4″ off from the front. Thankfully, I was able to shift and trim things ever so slightly to fix it. Sheesh, that was a close one!

IMG_1212

I really waffled about whether to cut the welts on the bias or to match them across the front. I cut some scraps of fabric for comparison, and ended up nixing the bias cut. The plaid is so large that it was hard to find a spot where the bias cut looked good. Before diving into the welt pocket construction, I took a practice run on scraps. The coating fabric isn’t super thick, but thick enough to create a challenge getting everything to lay flat. Basting the welts shut and giving it a good press with steam followed by a clapper did the trick.

IMG_1141

Since this is a proper tailored coat, I made sure to add shoulder pads (teeny tiny ones that I made!) and sleeve heads. The shoulder pad is just one layer of thick fleece covered in muslin, and the sleeve head is cut from a scrap of flannel. You can kind of see all the inner structure in this photo where I’m attaching the lining to the facing.

IMG_1208

I decided to make fabric covered buttons for the coat because there was nothing in a store that was going to be just right. Remember how I said I had coordinating wool fabrics? That came in handy here! The pink wool that I used to cover the buttons is lighter weight (I made a blazer out of it a while back) and was just the thing for covered buttons. For the buttonholes, I used top stitching thread to give them a little more substance. My machine does’t have a keyhole feature, unfortunately, so these are just plain jane. I thought of doing them by hand, but these ended up looking good enough.

IMG_1231

For once I didn’t want to rely on top stitching to keep the lapels nice and crisp, so I made sure to under stitch the collar, lapel, and front edge. Then I basted the edges and gave it all a good solid pressing and steaming, and let it set over night. This step makes all the difference in the world on the finished product.

IMG_1241

I couldn’t be more pleased with the outcome on this coat! The pattern is great, the fabric is perfect, and my daughter loves it. Initially, I was worried that the fit was a little too perfect, but It looks like she has a good 1.5″ in sleeve length for growing room. In other words, she should be able to wear it next fall/winter as well.

lisa g.